We hosted a Wine & Design event last week at my brother and sister-in-law's house to tackle a design dilemma in their new home. Tammy invited over about eight friends to enjoy wine, appetizers, and advice from the Chapin Group on how to decorate a fireplace mantle. We had a fabulous time and Tammy loved our styling. Check out the event:
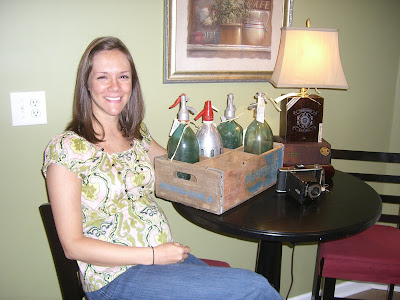
Tammy, who remains adorable while 7 months pregnant, takes a load off before the event starts. We brought several items from our antique booth to have on display during the event. Here, we showcased vintage seltzer bottles, a wooden Pepsi crate, an antique camera, and a Chapin Group custom-made cigar lamp.
Tammy and Brian's dining room table was covered with a spread of images from decorating magazines for everyone to peruse and find inspiration in.

Tammy and Brian appreciate comfort and like a casual feel to radiate through their home. They are an outdoorsy couple and enjoy spending time in their beautiful yard or in the park with their two playful dogs.
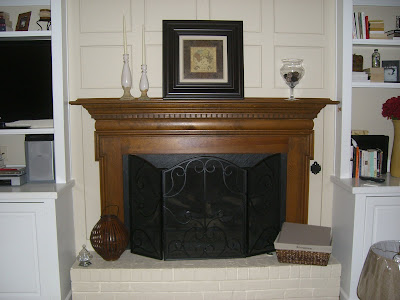
Here is the BEFORE picture of Tammy and Brian's mantle.
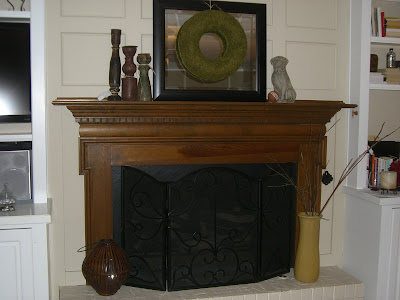
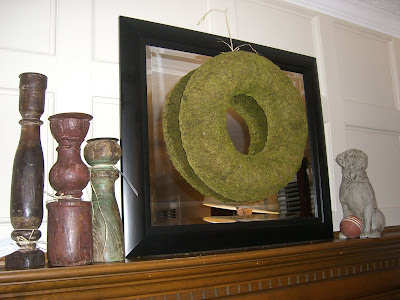
And here is the AFTER.
Again, BEFORE:
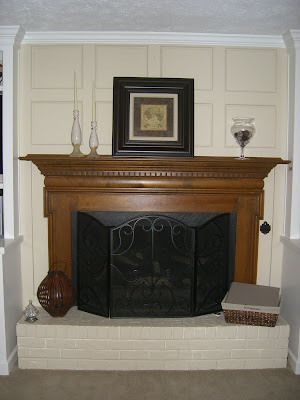
And, AFTER:

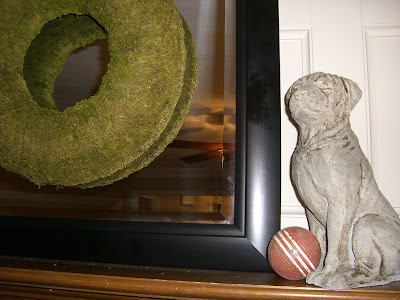
To reflect their personalities, we brought the outdoors in by hanging a moss wreath over a mirror above the mantle.
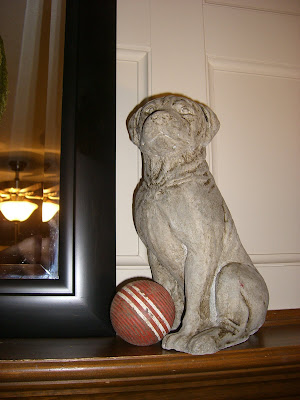
We found this fabulous dog statue that seemed just right as a focal point in their living room. We brought in the red from the room's curtains with the croquet ball for the pup. (Important to note: Brian and Tammy have been known to play croquet matches at Piedmont or Grant Park from time to time!)
These amazing vintage ballister candlesticks contribute additional color and add an interesting texture to the arrangement. They have been an incredibly popular item in our booth.

In addition to styling the mantle, we also presented an assortment of trayscapes to the group. Trays are a great way to update a room without a complete overhaul. Add a tray to your coffee table, end table, counter, or sidebar for a pop of personality.
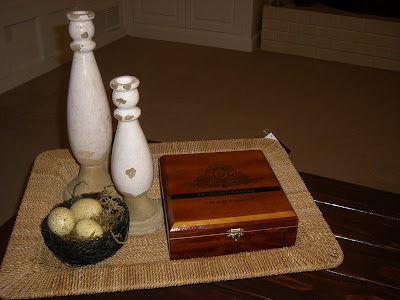
We gave this tray to Tammy and Brian as a thank you for hosting us. The rope tray adds a nice contrast to the dark, gloss of the coffee table. (The table was constructed by Brian-- more on that in another post!) The nest hints at the Spring season just around the corner. The cigar box is a GREAT hiding place for those unsightly remote controls.

This tray is what we like to call "Hollywood Regency". It's all glam and girly. It would be fabulous on a bar or in a girly guestroom.

This tray was designed with the guestroom in mind. It's a simple silver tray filled with contents to meet your guests needs: a small pad of paper, pen, a bookmark, and a lavender sachet for sweet dreams. Most importantly, it gives your guest a safe landing place for jewelry, a wallet, etc.


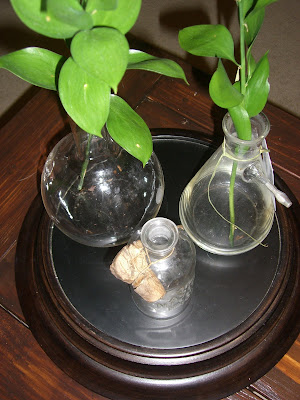
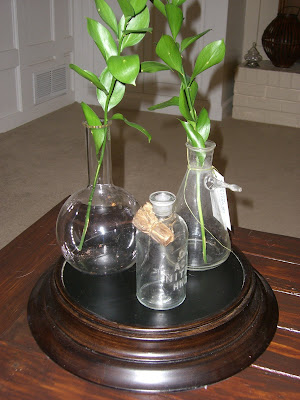
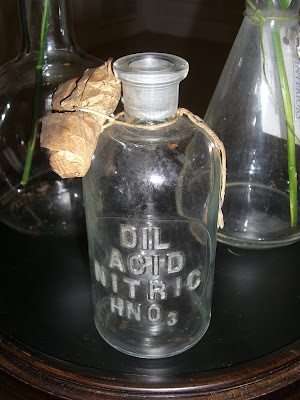
This is the trendiest tray of all. Set on a simple wooden platform, these vintage beakers are the epitome of cool. Add a few clippings from the yard for a clean, crisp look.
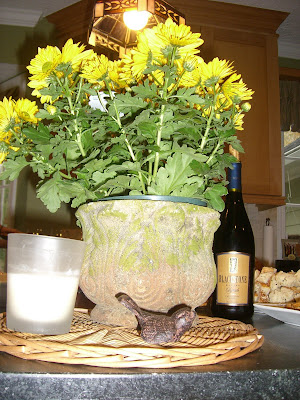
This tray adds a bright, cheery pop of color to the kitchen. The tray is simply a wicker charger repurposed as a tray. The mum is set in an urn (this one was actually from my wedding!) we found at Old Time Pottery. We set a simple candle and bird figurine alongside the urn to balance out the arrangement. (I apologize for the terrible picture!)
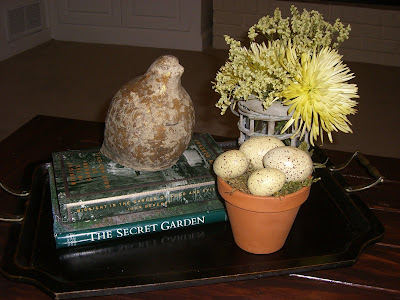
Finally, we constructed a seasonal tray to get everyone in the holiday spirit. The stacked garden-themed books add both height and color to the arrangement. The flower pot, eggs, and bunny are perfect for the upcoming Easter holiday.
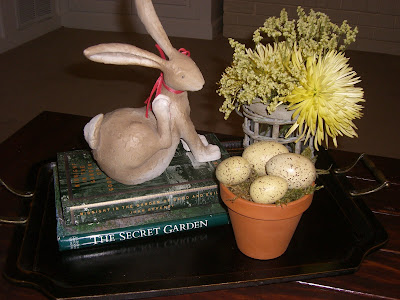
After Easter is over, convert this arrangement to a Springtime piece by switching out the bunny for this beautiful bird statue.
Whew! That was a long one. What do you think of the transformation? What about the trays?
Have a great day-- and say a little prayer for me as I take my Finance final Monday night!
Ashley