Since my last post, I have had several readers and friends ask me to post the recipe for cake pops. You might ask, "What is a cake pop?" They are just that-- a delicious cake-based lollipop. I have to thank my mom for introducing me to these tasty treats, and my dear friend Maggie for conquering my first batch of cake pops with me.

[Leigh and I enjoy a cake pop...or three!]
Cake pops are great for parties or any other festive occasion. My friend Jennifer asked about making them as a favor for her daughter's first birthday party-- what a great idea! Simply cover the cake pop with cellophane, add a themed tag that says "thank you", "congratulations", or whatever the occasion may warrant, and tie it off with a pretty ribbon. The end result is a simple and inexpensive, but adorable party favor. An added bonus? Cake pops make for a great display that can add to your overall party decor.

[Tailgating cake pops my mom made for the UGA game. Love the football field-inspired holder.]
I am almost embarrassed to tell you how easy they are to make. I will tell you, however, that while easy, they are relatively time consuming. I recommend allocating plenty of time if this is your first attempt. These little delicious desserts can be made the day before and stored at room temperature.
- 1 cake made from scratch or from any box cake mix (I opted for the box!)
- 1/2 container of frosting (yep, store bought)
- 2 bags of chocolate candy melts (pick these up at Michaels or Hobby Lobby-- any color will do)
- 1 Tablespoon shortening
- Approximately 50 candy sticks (again, found at Michaels or Hobby Lobby)
- Block of styrofoam large enough to hold 50 cake pops
Directions:
Bake cake according to package instructions. Allow cake to cool completely. Crumble the cooked cake into a large mixing bowl. Once entire cake is crumbled, add the frosting and mix well.
Roll cake mixture into 1-inch balls (each batch makes 35-50 cake pops). Place cake balls into the refrigerator to chill. (This helps keep the ball in one place later in the process.)
Melt the chocolate and place it in a large bowl. Mix shortening into melted chocolate. (This is an important step, because it gives the chocolate a creamier, easier-to-work-with consistency.) Dip the end of one candy stick in the chocolate mixture and then place it into the center of one of the cake dough balls. (This step will keep the cake ball attached to the stick.) Again, return the cake balls to the refrigerator to help the stick set. (This is not a must-- but I think that it helps keep the cake balls from falling off.)
Once chocolate has hardened, dip one side of the cake ball into the chocolate, then spoon chocolate over the uncovered portion of the cake ball. CAREFULLY, tap stick on bowl to remove any excess chocolate. (Maggie and I learned the hard way that if you tap too hard-- the cake ball falls off the stick. The good part? You can taste test those!)
Place cake pop into the styrofoam to set.
See? Easy-peasy.
Want to take it to the next level? Cut the styrofoam to fit in the lid of a copy paper box. Wrap the box top in a fabric that fits the occasion. Spray paint the styrofoam to match, noting that you must use special spray paint that can be used on styrofoam. (I picked mine up at Michaels.)
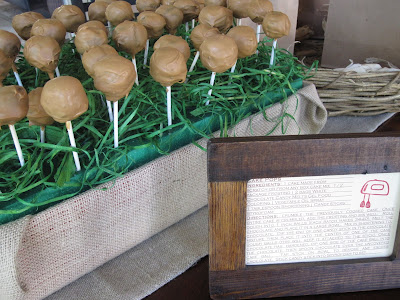
[Remember that football field? Here, I wrapped the box in burlap for Kristen and Joe's fall-themed wedding shower. Perfect!]
Inspired? Are you going to try it for yourself? Send me your pictures! I would love to see and post all of your creations.
Have a great day!
Ashley